

+(2).jpg)
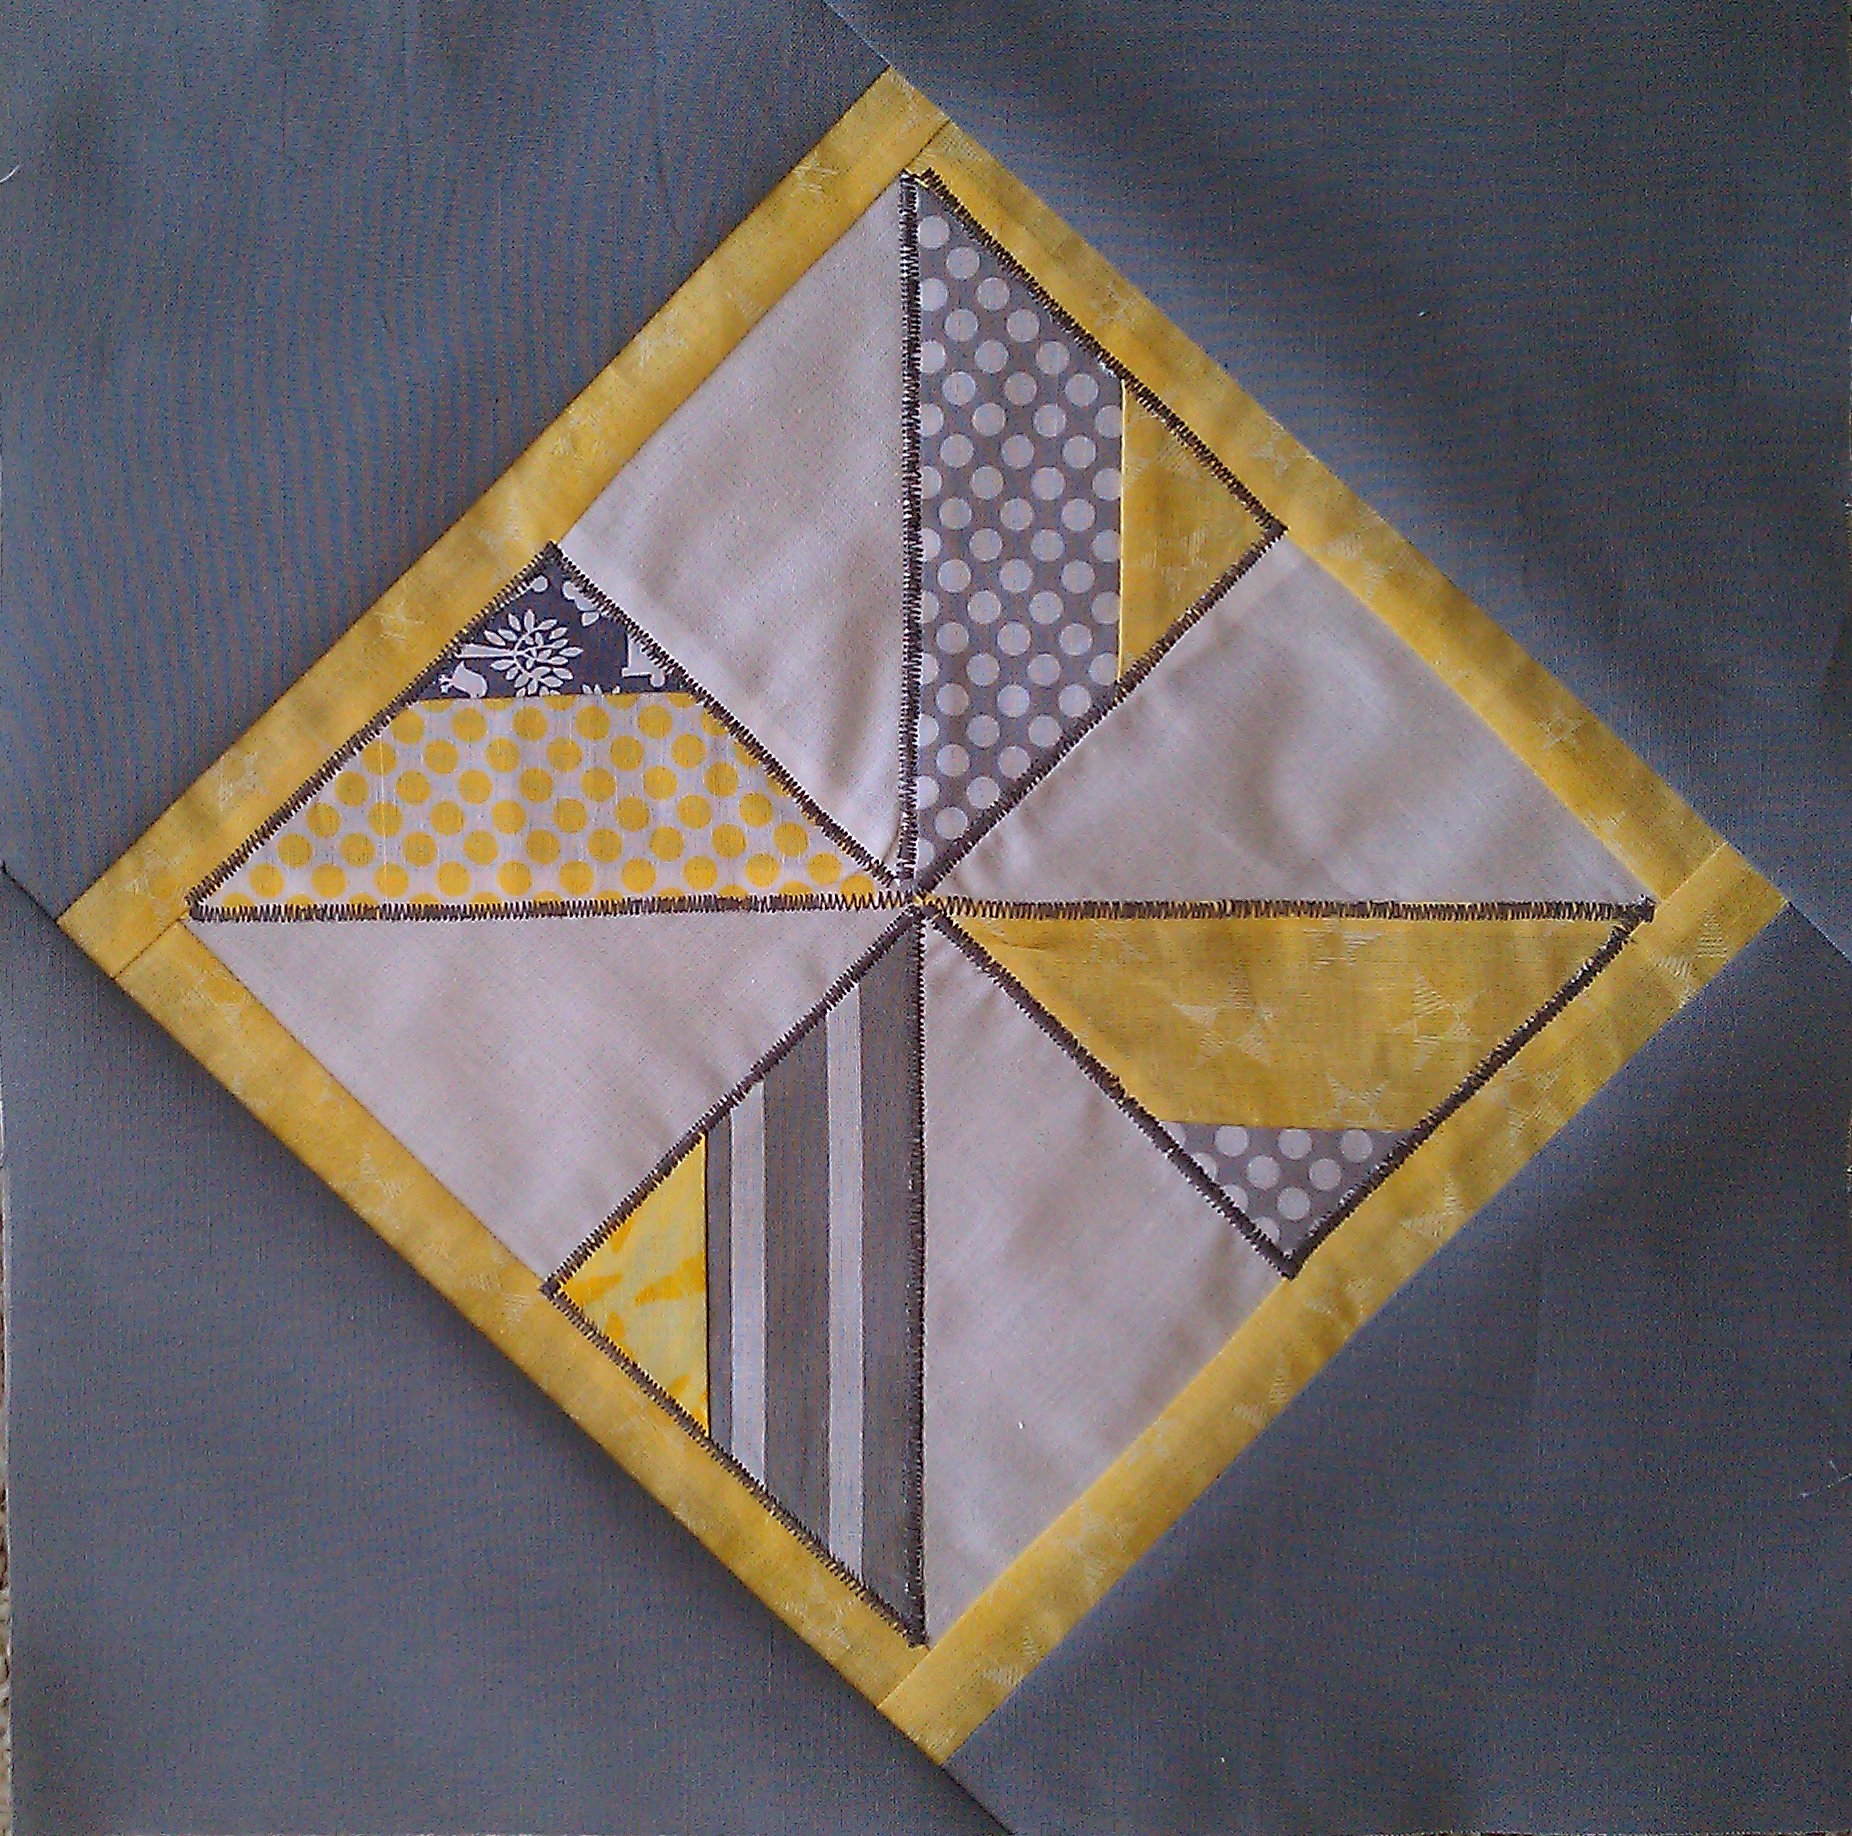
Using the following measurements your block should measure up 8.5inches unfinished and will finish up at 8 inches once sewn together into a quilt top.All seam allowances are 1/4 inch.
First we need to take our 3 inch squares and make our pinwheels using half square triangles.
Pair up one of your 3 inch solid squares with one of your 3 inch feature squares and place them right sides together. Draw a line diagonally from one corner to the other.
.JPG)
Sew 1/4 of an inch on either side of the lines
.JPG)
Cut line down the middle so that you now have 2 half square triangles.
Carefully press back into squares and trim down to a 2.5 inch square.
Repeat with the other 3 inch squares
Piece your 4 half square triangles into a pinwheel
.JPG)
Step 2: Adding our sashing
Take your 21 inch long strip and cut two pieces that are the same length as the sides of the pinwheel.
Sew them onto two of the sides
.JPG)
Repeat for the other two sides
.JPG)
Step 3: Adding the surround
Take 1 of your large triangle bits. Place it upside down on one of the sides so that there is even overhang off each side of the pinwheel.
Sew it on.
Repeat for the side opposite.
Press the seams over
.JPG)
Repeat for the other two sides and carefully trim down to 8.5 inches.
Just make sure that you keep the pinwheel somewhat centred…
Trim the seams on the back down also so that your seams are neat 1/4 inch seams.
.JPG)
Step 4: Finishing
Take your 2 inch accent squares and lay one right side down at one of the corners. Make sure the edges line up neatly.
Sew a line on the diagonal from one side to the other
Repeat to the other 3 corners
.JPG)
Press over so that the squares are folded in half to make triangles
Trim the bottom two layers down to 1/4 inch seams and your block is finished
Yay!
.JPG)
And here are two together…

Quick, easy & effective. Just how I like it 🙂
Hope you have fun with it!

what a fun block, Kat. Love it!!!
Thank you Kat for joining in the fun with your beautiful block.
Pretty block 🙂
You do instructions so well!
Cool! I think my next Stitch Tease block has to have pinwheels in it, so I maye be using this!
Lovely!
Love the blocks! Think I’ll be adding a few to my new MAM project =D
love. simply love.
Great block K – another contender for our do. Good Stitches quilts??