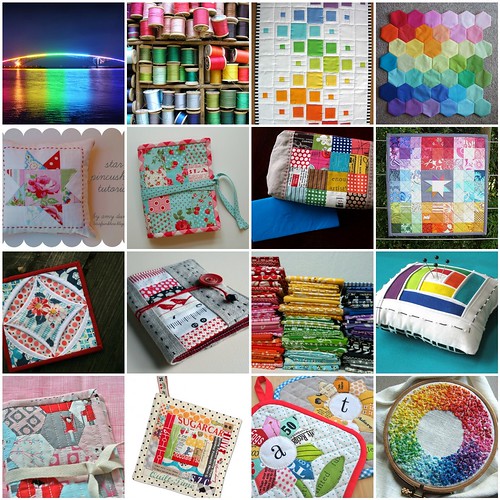
Good choice because they are so pretty and fun once they’re done!
Let me share with you how:
Step 1: Go to Big Huge Labs: Do Fun Stuff With Your Photos
Firstly don’t get distracted by all the other super fun stuff you can do with your photos – you can come back to that later ;P
Secondly select the mosaic maker:
Once you’re there it should be pretty self explanatory. The only thing I ever change is the number of rows & columns I want it to have because obviously that changes depending on how many photos you want to include.
Step 2: In a separate tab (or window) open your Flickr Favourites.
Now it’s just a matter of clicking in Flickr on each of the photos you want to include to bring them up to full size – and then copying the URL into the part in the mosaic maker.
I always upload my photos individually because I just find it easier to streamline – but you can do it one of the other ways if you prefer.
Go through and fill up how ever many boxes/pictures you want. Then scroll down and press the big blue create button.
Step 3: Save & Share
Yay you are done with your pretty mosaic. Hopefully all the boxes are full and it looks all pretty. If there is a white box or two then don’t panic – all it means is that whoever owns the photo has opted out of letting people use it for mosaics – it’s rare but it sometimes happens. So in that case you will have to choose another photo.
Warning: if you want to make any changes at this point do not push the back arrow!!! You will lose everything and have to start all over. You must click on edit mosaic and it will take you back to make edits. Remember which box was blank and that is the number photo you have to change.
If you are happy with your mosaic then it’s just a matter of saving it. You can do 1 of 2 options. You can select to save it to your hard drive (if you also want a copy) or you can select to share it straight with Flickr. Choose which one you want and follow the prompts. Too easy.
Well done you! You should now have a pretty mosaic!
Step 4: Add it to the Flickr group photo pool
Easy – go to the photo in your photostream. Click on Actions. Select Add/Remove from a group.
That will bring up a little dialogue box and you just need to select the group you want. (For example Scrappy Swap 2011) – you do first need to be a member of the group though.
Done.
Hope that helps 🙂


brilliant!!! I just this morning googled this!! 🙂
Ciao Kat!
Questo tutorial è meraviglioso!
Grazie!
(Ti confesso che mi piacerebbe anche scoprire, prima o poi, come si fanno i mosaici di foto dove ognuna delle foto ha un link separato).
A presto.
Loryan
Thanks Kat!
I know how to do it, well let’s say I’ve done it before but you’ve saved me having to sit and stare at the screen trying to remember how to do it this afternoon.
Great tutorial, thanks!
Love the ‘for example bit’. Everyone go and join up the Scrappy Swap. Please! It’s going to be great!
Will be using it this weekend, my dear! Thank you 🙂
I have been wondering how y’all did those cool mosaics – you must’ve read my mind!
Thanks for the tute!!
Excellent..I’ll be referring back to your awesome tutorial this weekend while I curse technology trying to set up a mosaic….expect an email. (It will likely start with incoherent sobbing )
I’m going to bookmark that site!
thank you! i have been wondering how to do this on my blog!