
It’s done, it’s done and I couldn’t be happier!
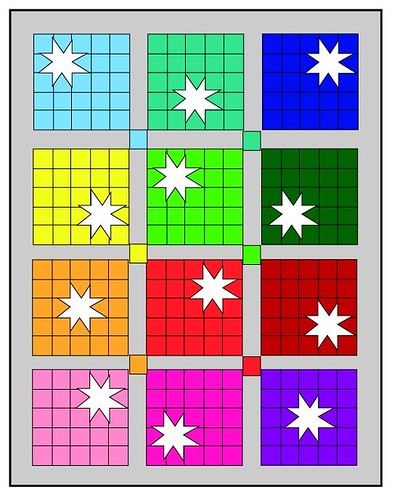
From this rough idea in my head…
To this finished quilt…
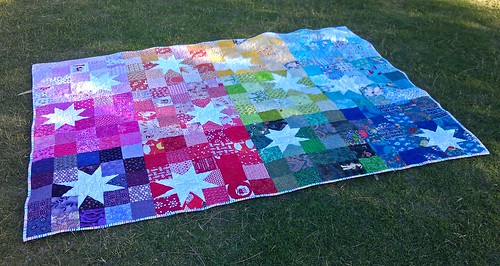
It has taken shape even better than I possibly imagined!
Huge thanks need to go to my Sew & Bee-Happy ladies for helping me make this quilt… Leona, Emma, Allie, Henny, Wendi, Cindy, Judith, Nicky, Kara and Hilary.
I really love the fact that so many of us have made this quilt together!
So what are the final details?
Quilting: I decided to live dangerously when I quilted and use white thread on the front & navy thread on the back. Eeek I was a bit nervous because that left no room for tension error with my free-motion quilting, but I’m pleased to say that it all worked out fine. Phew! I must be improving (or getting to know my machine settings better, one of the two 😉 )
I free-motion quilted it using an all over swirly heart pattern. I think I’m getting lazy because that has become my go-to quilting pattern now. I could have done something else, but since the back has rainbow hearts all over I decided to go with the heart quilting too.
You can see a wee sneak of the back in this photo:
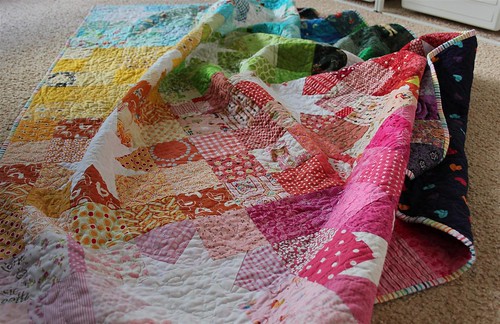
Backing: I didn’t take a full one of the back since I just used an all over print.
Next time I have the wise idea to use stretch knit for the back of a quilt, just shoot me first!! What a PAINFUL exercise that was and I think I’m running nearly a week behind in jobs now because I procrastinated so much over finishing but I didn’t want to take it off my machine…
It just did not want to slide, therefore was super hard work on the shoulders to quilt. Way more work than it needed to be.
Of course I could have done myself a favour and stuck with straight lines – that probably would have worked out ok. But no… I had to go for the free-motion didn’t I!
Never.again.
BUT
In saying all that I LOVE the back. The navy fabric with rainbow hearts is just perfect for this quilt which is why I chose it in the first place. It not only compliments the front perfectly but is a perfect choice for a picnic blanket, which is what I plan to use this for.
So alls well that ends well.
I know it’s giving some of my friends shivers at the thought of using this as a “picnic” blanket, but honestly 99% of the time that just means something to sit on while we’re at the beach, so that we’re not sitting straight on the hot sand. This will suit that purpose perfectly, and we certainly won’t get lost in a crowd will we 😉
Binding: The binding is perhaps the only part I’m not completely happy with it. I decided to use a rainbow stripe on a white background. I’m kind of wishing I had gone for something in navy like the back to frame it a bit better – or actually I really liked the edges raw and just pinked. But I was a little worried about how that would wear long term with the wadding exposed so wussed out and did binding.
Anyway it’s growing on me and I’m sure I’ll forget all about liking it better raw very quickly.
We’ve already used it for 2 picnics and it’s been broken in by 2 sets of baby toes…
.jpg)
.jpg)
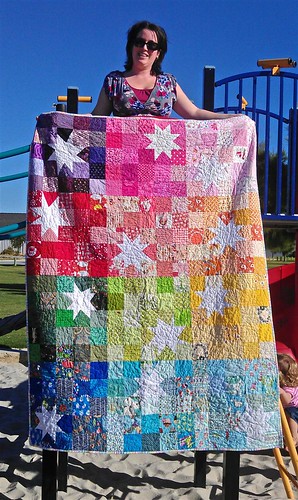
Finished Quilt: of course lets not forget the obligatory rolled up pose:
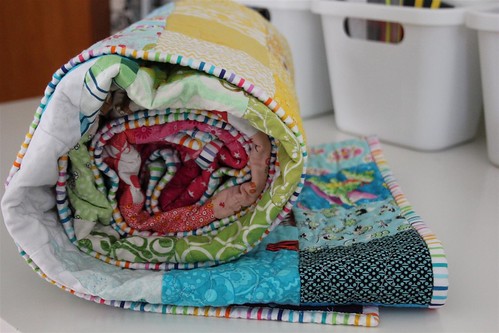
And one more just for luck…

Tutorial for the block is found here…
And as usual if you end up making it from my tutorial I’d love to see your version!! 🙂
I think this might only be my second finished quilt for the year and the other one I finished on the 1st January!! But a ha… I just finished another today, so watch this space for another reveal…
Linking up with Fabric Tuesday and Show me what ya got…

It looks great Kat. Since it was an all over quilting pattern, could you have turned it over and had the back on top while you were quilting?
dxx
This was such a great idea for a bee block, and your finished quilt turned out SO well! I’ve occasionally had to quilt a quilt upside down (with the back on top) if I’m using minky or something else that doesn’t slide well. As long as I’m planning on doing some kind of all over design, it works out much better than fighting the friction the whole way through. Just a thought for next time 🙂
This is one of my favourite quilts of yours and was very much the inspiration behind my blocks for Stitch Tease. Hope my quilt looks half as good!
it turned out great! love it…. I’m always skeptical about using two colors of threads when quilting
Oh its even more better-er in person!!! LOVE IT! And check you out pretty lady on the jungle gym 🙂
Wow! What a beautiful quilt!
Great finish! I love rainbow quilts!
That’s beautiful!! Congratulations!! May it see many a happy picnics 🙂
It is stunning! Well done 🙂
So pretty! I love the reverse stars!
beautiful. just beautiful. x
This quilt is absolutely stunning. It is a great accomplishment especially since you designed it yourself.
Love this one!
what a gorgeous quilt!!! So beautiful, love the design and the colors you chose. You’re definitely going to stand out – in a great way- from all the other crowds at the beach.
EEEE!!!! I love it, I love it, I love it. It’s absolutely gorgeous, Kat. Well done! xx
It looks absolutely fab! I’m with you on ‘great’ ideas for backs right now, currently striking flanellette sheets off the list of things to use in further projects o.O
Now that is a picnic rug to envy!
It’s lovely, and yes, I shall be referring back when I get to doing Susan’s block xxx
It looks amazing! I love the colours and the style of the block =D
In a word- gorgeous. I love everything about it. The colours , the quilting, that binding!
Absolutely love, love, love it! It turned out beautifully and the binding looks pretty swish in the “roll” photo too!
I love it. (How could anyone not? It is gorgeous!) I especially love that you are using it. That makes my heart sing! I love it when quilts are used. Beautiful, AND useful. William Morris would be proud.
Very nice… Looks like you would of had a lot of fun making it!
It’s turned out so lovely Kat. Great work 🙂
This quilt is SOOOOO beautiful!! Liz (www.howling-liz.blogspot.com)
Hi Kat! It’s so beautiful! I love everything in your quilt, stars, colours and the pattern! x Teje
Oh wow, what a gorgeous quilt! I love how you photographed it too!
Such a fun quilt, thanks for the inspiration!
I love it! That rainbow binding really does it for me! Nice work!!
I love your quilt, what nice colors!
Gorgeous pics K! At least you live in the part of the world that gets good use out of picnic rugs!! Enjoy! Jxo
That is one pretty quilt!! Love the stars shining in the multi-color sky.
This is spectacular! I will definitely add this pattern to my to-do list. Great way to use up scraps and what a stunning effect!
Wow I love that so much, oh I want to make one too!
I just found your blog through this quilt on Flickr. It’s lovely and fun and happy. I love it! Enjoy your quilt! http://www.paperstarfish.prettyposies.com
I love it I love it I love it
Did I say I like it?
This is defenitely on my TO DO list.
I’ll have a look right now whether I have enough fabric for it.
Love it!!!
I just found your blog today!
What a fabulous quilt! I just love everything about it, and you even shared the tutorial!
I’ve just discovered charm swapping, so when I saw your quilt I found myself thinking of all the rainbow colors that will be arriving in my mail box soon! Thank you so much for the inspiration!