

I have been wracking and wracking my brains over the last few days to come up with a block for my month {February} for my Sew & Bee-Happy bee ladies to make me. After much indecision I think I’ve finally come up with a plan for my quilt…
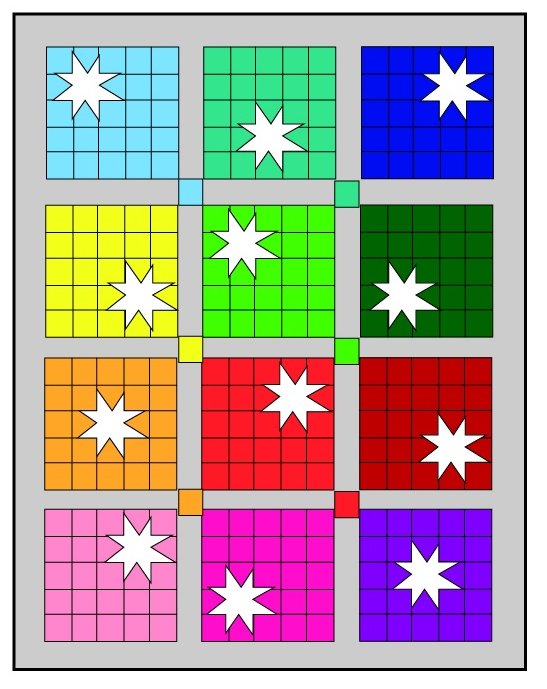
I’m thinking along the lines of a rainbow picnic blanket, so I made this very rough little mock up in my Adobe Illustrator {nope no EQ7 in this house} to give them an idea of what I was hoping for…
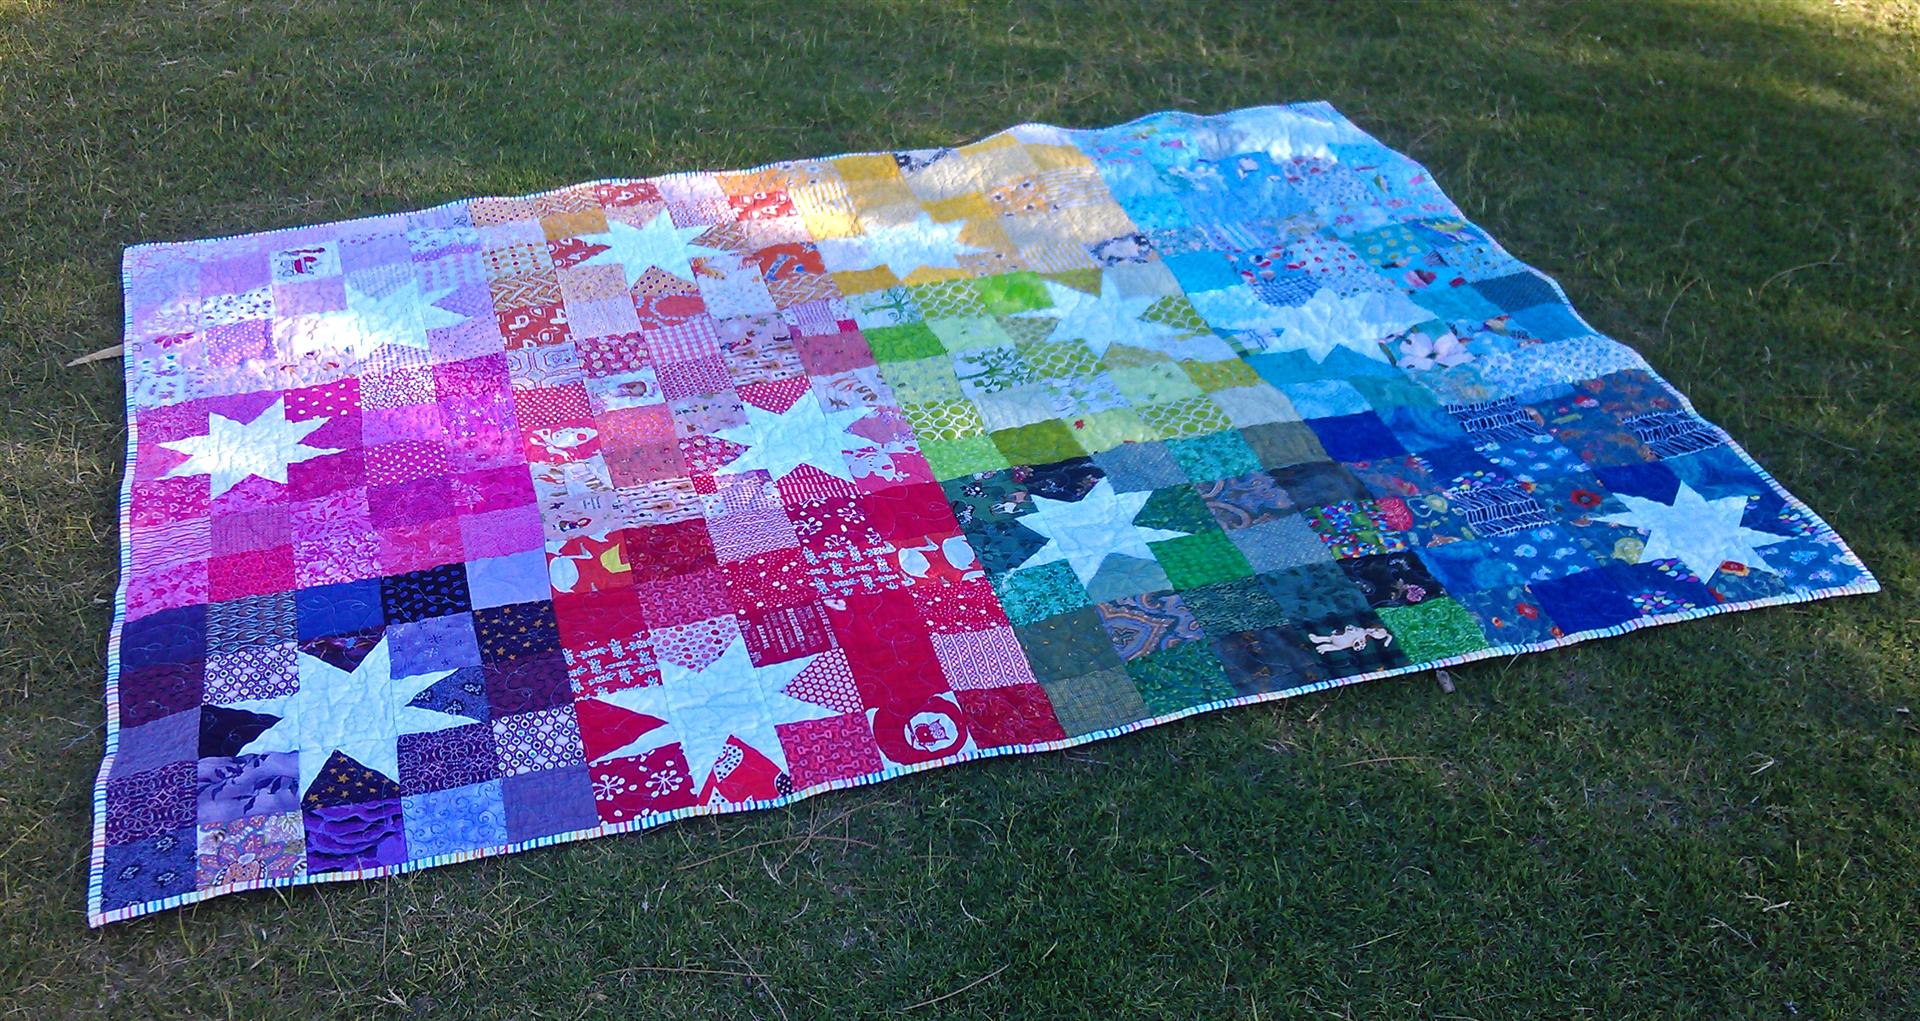
** Edited to add: You can now read about the finished quilt and see all the pictures here.
But here is the finished version:
The colours are obviously pretty sickly in the example, and the sashing colour is still up for debate (currently I’m pondering grey or a black & white print – that won’t be decided until I have all 12 blocks made) but imagine fabric blocks in the colours of the rainbow with white stars in and you’ll be halfway there.
Here is my sample block:
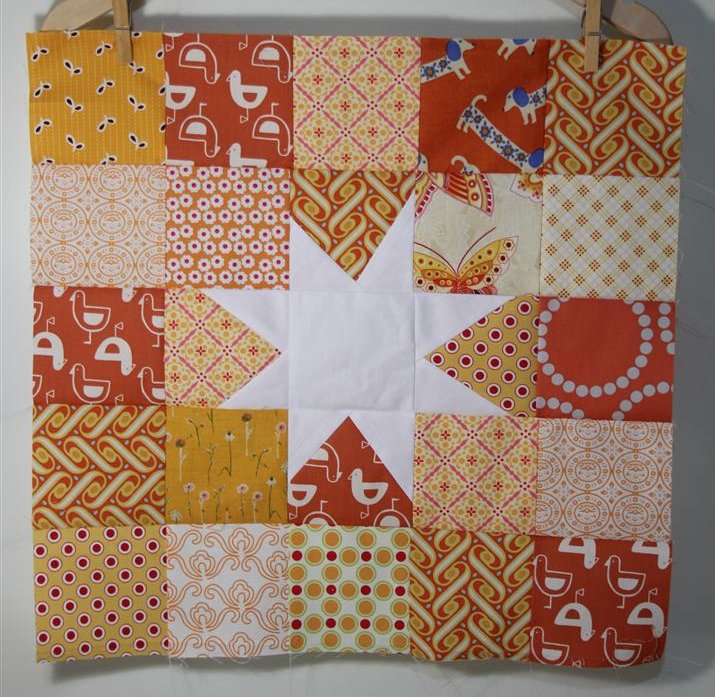
This is the lighter orange block & there will be another orange block to come which is more a pinky/corally orange, heading more into red.
So here are the measurements & instructions for the block. Feel free to sew along with us. It would make a perfect scrap buster and lends itself to different sizes nicely!!
Ingredients for each 17.5 inch unfinished block:
** 24 of 4×4 inch square of your colour fabric
** 1 of 4 x 4 inch square of your white fabric
** 8 small scraps, approx 4 x 2.5 inch for your wonky star points.
Instructions:
Lay out your coloured fabric squares along with your 4 inch white square (centre of your star) where you would like them in your final block. It works best if you have the largest amounts of different prints possible. I was working entirely from my scrap bin so I had some repeats of some fabrics. If that’s also the case for you then just spread them out evenly in different rows/columns…
.JPG)
Now we want to make our first star point pieces.
Take the coloured squares directly above, below, to the left & to the right of your white square.
With the first one, place one of your white scraps like the photo below…
.JPG)
You just need to make sure than when flipped over the white covers the entire orange corner with no gaps.
Sew using a 1/4 inch seam…

Iron over your white so that it covers the orange corner…

Trim the white flush with the orange square…

Then flip square over and trim the orange corner to be flush with the white so that it is now 1/4 inch seam…

Repeat with the second piece of white like so…


And trim.
Now you should have your first 2 star points…

Repeat with the other 3 coloured pieces so that you have all 8 points of your star made & put them back in your layout…

Time to join our squares together…
Join them together into rows, then join the rows together to make your finished block.
Square up your block to 17.5 inches.
Stand back & admire your reverse Rainbow Starburst Block…
Too easy…
I think this will be a pretty fabulous picnic blanket! But I’m picking it will be a while before it’s finished – perhaps for next Summer?
There goes another new WIP to the pile anyway 😉
Linking up to Fabric Tuesday
Enjoy

So pretty! Very original looking. Not that you asked, but I am really liking the black and white binding look lately, and would love to see it as sashing. 😉 I got that pattern in the mail to you today.
I really like your idea. Great way to use scraps.
I really like your star point block. What a great idea. These will make a beautiful quilt.
Stunning as always Mrs Flutter! xx
Great tute K! I’ll get right on it! Jxo
This is great. It reminds me of something I made for a bee block last year – except alas, my work always finishes with teeny 1″ squares… lol. I can’t seem to leave the fabric in nice big pieces. I like the idea of alternating the location of the stars!
This looks like a great block K!
Are you inside my head twinnie??? This is exactly what I plan to do with my rainbow charms. I’m not even joking!!
nice idea – but do you think it’s wise to use white on a picknick blanket?
Love this quilt. What a great way to use up those little bits and pieces of scraps!!!!
I like this block a lot. It is cool how you decided to put the stars in diffident locations.
http://richardquilts.blogspot.com
Cool, and with all the fun fabrics, the kids will be able to play I Spy with it too!
Love it. Can’t wait to see it finished so I became a follower!
So cute!! Thanks for the tutorial!
This is such a wonderful tutorial– I love this block! I haven’t seen it in reverse before. Thanks for sharing your idea!!
How smart to extend the block to 25 squares and move the star around! So clever! Congratulations! Can’t wait to see the final result!
Love this block idea! Thanks for showing how it’s done. I’ve had a lot of fun recently learning how to make stars for a QAL and can definitely see myself making more in the future!
It’s just lovely!!!
Hi Kat, I just love this block! Do you mind if I use it for my QCA bee block? x
Wow! What a gorgeous block, and thanks for the beautifully-written tutorial!
Fantastic tutorial. Can I use it for a bee block giving full credit and linking back to you. thanks Sharon
Great block & quilt. This would make a great quilt for Quilts of Valor. Thanks!
I agree! Can we use it for our QOV sew-ins? LOLQOV.blogspot.com
I really love the look of this quilt. I think this would be a lovely quilt to start for my two grand daughters…. 🙂
just stopping by from my flicker group Quilting for KIDS, I am volunteering to make a block for the group. Thank you for the tutorial. Shirley
Another great quilt for kids to make kids! Thank you for sharing this color-full quilt.
Hi Kat, I know you posted this awhile ago, but I was referred to your blog for this tutorial by another woman in our Modern Quilt Guild that ask us to make blocks for her using your pattern. Great job! This is so easy to make. I’ve added your link to my blog.
Thank you so much for this tutorial/pattern! I actually used it to make a wedding quilt for my cousin, and I’m planning to make a couple more with the same pattern because it’s so simple, but so fun and turns out looking wonderful!
(If you have any interest, I put up some pictures of my cousin’s quilt here: http://lovely-patches.tumblr.com/post/89098968908/the-rainbow-block-quilt-i-made-for-my-cousins )